I love the way abstract tattoo design stencils turn ideas into bold shapes and flowing lines. They let me explore form color and negative space in ways that traditional designs seldom do. Whether I want a subtle geometric hint or a dramatic brushstroke the stencil becomes my map.
In this article I’ll walk you through how abstract tattoo stencils work how to pick the right one and how to adapt a stencil to your style and skin. You’ll get practical tips from design selection to placement and aftercare so you can make confident choices and get a tattoo that feels uniquely yours.
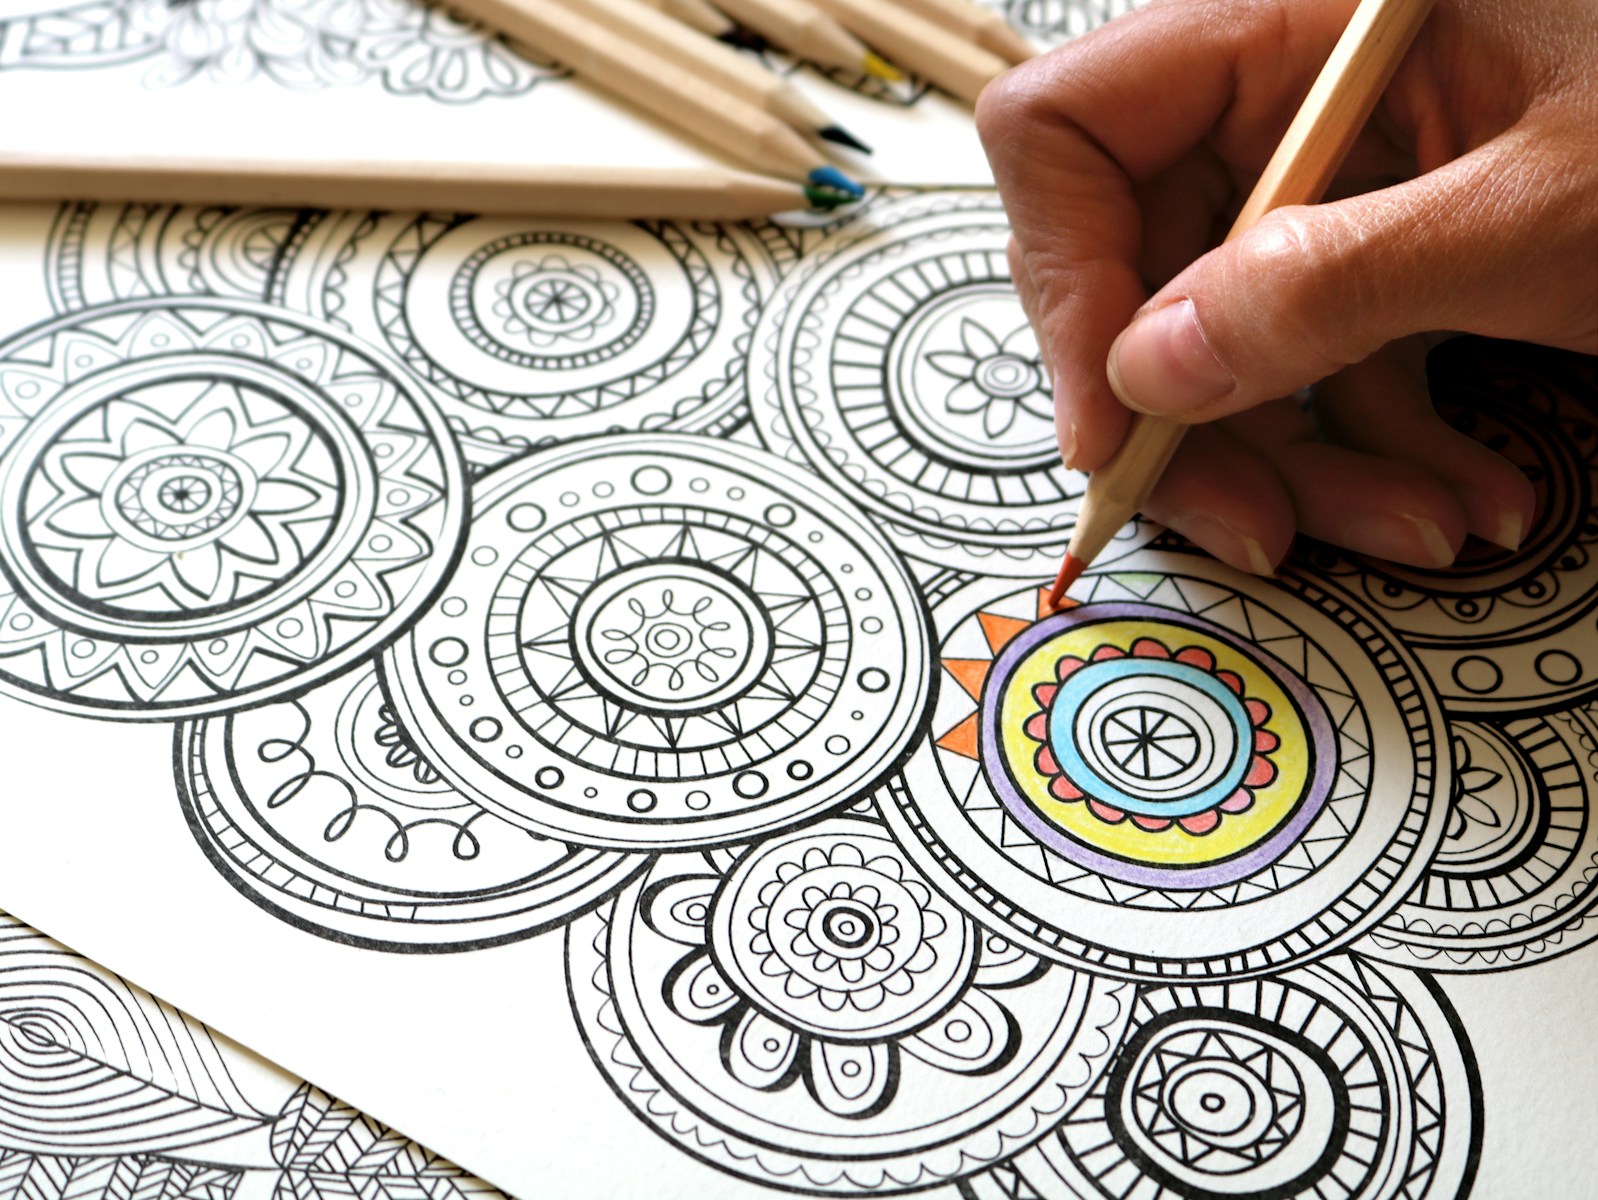
What Are Abstract Tattoo Stencils
I define abstract tattoo stencils as template outlines that translate nonrepresentational art into skin-ready patterns. I use them to map form color and negative space before inking.
Origins And Artistic Influence
I trace abstract tattoo stencils to 20th century art movements that prioritized shape and gesture. Cubism emphasized fractured planes and multiple perspectives (Britannica). Abstract Expressionism prioritized spontaneous mark making and large scale brushwork (Tate). Surrealism introduced automatism and unexpected juxtapositions (MoMA). I borrow composition rules from these movements to design abstract stencil elements like geometric shards organic swirls and gestural strokes.
I note three practical lineages that shape stencil work
- Modern fine art movements for composition and tension
- Graphic design for clean repeatable lines
- Street art for scale and adaptability
I adapt art concepts to tattoo stencil constraints by simplifying complex brushwork into single pass lines and selective shading so the abstract stencil reads on skin at various sizes.
How Stencils Differ From Freehand Designs
I outline five functional differences between abstract tattoo stencils and freehand work
- Reproducibility: stencils replicate exact shapes across sessions and clients
- Precision: stencils guide consistent line weight and placement
- Speed: stencils reduce decision time during the session
- Predictability: stencils let me preview negative space and flow on the body
- Flexibility: stencils allow on-the-spot edits before inking
I explain stylistic differences next. Stencils lock a design hierarchy first then allow color and texture choices later. Freehand starts with gesture then refines shape while inking. I prefer stencils when a client wants an exact abstract motif and I choose freehand when organic improvisation matters more.
I include practical selection tips I use when picking an abstract tattoo stencil
- Choose scale that reads at the intended placement for example forearm shoulder chest
- Check negative space balance under natural movement for example bending stretching
- Test transfer on practice skin to confirm line clarity and edge break
I reference technical standards where relevant. The Society of Tattoo Artists publishes best practices on stencil transfer and placement (Society of Tattoo Artists).
Benefits Of Using Abstract Tattoo Stencils
I use abstract tattoo stencils to translate complex compositions into reliable skin patterns. They speed up workflow and improve final results.
Consistency And Precision
I get predictable line placement when I apply a stencil to skin. I maintain scale and negative space balance across sessions when I trace the same template. I reduce human error during high detail work when I rely on stencils instead of freehand. I match prior pieces for touch ups or matching sets when I keep original stencil files. Industry transfer standards back predictable placement and sterile handling (Society of Tattoo Artists).
Time Savings For Artists And Clients
I shorten chair time when I use a ready stencil. I avoid repeated redraws during a session when the stencil fits the placement. I cut setup variance for apprentices and shops when I distribute consistent templates. I lower overall session length by a measurable amount which helps client scheduling.
| Task | Typical time without stencil | Typical time with stencil |
|---|---|---|
| Design placement and redraws | 30 to 60 minutes | 5 to 15 minutes |
| Linework setup | 10 to 30 minutes | 5 to 10 minutes |
| Full session variance | ±30 minutes | ±10 minutes |
Types Of Abstract Tattoo Stencils
I break abstract tattoo stencils into three practical types below. I describe use cases and technique tips for each type.
Geometric And Line-Based Stencils
I use geometric and line-based stencils when precision matters.
I prefer them for grid work concentric designs and architectural motifs.
Benefits include repeatability and crisp edge control.
Practical tips
- Scale: match stencil line weight to needle size and skin area
- Placement: align major axes to anatomical landmarks like forearm center or rib curvature
- Transfer test: print on practice skin and trace to confirm line fidelity
Organic And Fluid Shapes
I choose organic and fluid shapes when I want flow and movement.
I use them for watercolor effects biomorphic forms and negative space interplay.
Benefits include natural transitions and softer healing edges.
Practical tips
- Composition: prioritize negative space to preserve skin contrast
- Shading: plan gradients that follow the shape’s flow to reduce blowout risk
- Transfer test: apply stencil to stretched practice skin to check contour compliance
Mixed Media And Hybrid Stencils
I combine approaches when designs require contrast and texture.
I blend geometric anchors with organic fills and graphic accents.
Benefits include layered depth and controlled spontaneity.
- Layering: place rigid elements first then overlay fluid elements to maintain registration
- Timing: schedule 1 to 2 extra minutes per layer for alignment and adjustments
- Transfer test: use multi-pass transfers on practice skin to verify layer registration
How To Create Your Own Abstract Tattoo Stencils
I outline a clear workflow for creating custom abstract tattoo stencils. I focus on design intent transfer digital prep and reliable transfer methods.
Designing A Concept And Sketching
- Sketch initial ideas. I use 3 to 5 thumbnail sketches to test composition balance and negative space.
- Refine chosen sketch. I simplify overlapping elements to maintain clear linework and avoid dense shading areas.
- Test scale on paper. I trace the sketch at the intended final size then mark surrounding anatomy landmarks for placement reference.
- Validate transfer on practice skin. I apply a quick pencil transfer to synthetic skin then adjust line weight and spacing for readability.
- Document design notes. I list line thicknesses, focal points, and areas for color or negative space so the stencil matches the concept.
Digitizing And Preparing Stencil Files
- Scan the refined sketch. I scan at 300 to 600 dpi to preserve edge detail for vector work.
- Vectorize the image. I use Adobe Illustrator or Affinity Designer to convert strokes to clean paths for predictable scaling.
- Clean paths and simplify nodes. I remove micronodes under 4 px and reduce anchor points to ensure smooth lines.
- Layer artwork by function. I separate linework solid shapes and texture layers so the stencil shows exact transfer priorities.
- Export files in standard formats. I save EPS and PDF for vector fidelity and PNG at 300 dpi for reference (Society of Tattoo Artists).
Cutting And Transferring Techniques
- Prepare stencil paper. I use thermal stencil paper for machine cutting and hectograph paper for hand transfers.
- Cut or print the stencil. I use a thermal copier for multi-copy work and a cutting machine for vinyl masks when full coverage is needed.
- Test dry transfer. I place the stencil against synthetic skin then lift slowly to check edge fidelity and alignment.
- Apply to client skin. I shave and degrease the area then position the stencil using anatomical landmarks and a level if required.
- Secure transfer then check accuracy. I press evenly then if the paper shifts I reposition before ink application.
- Seal stencil for long sessions. I apply a thin barrier film over the stencil when sessions exceed 90 minutes to prevent smudging and loss of detail.
Sources: Society of Tattoo Artists standards on stencil transfer and placement.
Tips For Tattoo Artists Using Abstract Stencils
I give focused tips for sizing placement and stencil customization to speed workflow and preserve design intent.
Sizing, Placement, And Body Flow
I measure stencil scale against body landmarks so shape follows muscle and bone. I test transfers on practice skin then on the client to confirm scale and negative space. I align major axes of the abstract tattoo stencil with limbs or torso lines so flow reads from multiple angles. I mark micro-adjustments with a skin-safe pen then reapply the stencil if needed. I reference positioning standards from the Society of Tattoo Artists when placement affects joints or high-movement zones (Society of Tattoo Artists).
Time impact of stencil use
| Task | Without stencil (min) | With stencil (min) |
|---|---|---|
| Design placement and redraws | 30–60 | 5–15 |
| Line setup during session | 60–120 | 30–60 |
Customizing Stencils For Clients
I scale and segment abstract tattoo stencils to match skin texture and client anatomy. I simplify dense linework for thin or scarred skin then add back detail with shading. I discuss negative space intentions with clients and show a stencil mockup so they can approve placement. I document client-specific notes such as orientation preferences and pain tolerance so future sessions maintain consistency.
Working With Complex Or Layered Stencils
I break layered abstract tattoo stencils into numbered passes so each layer transfers cleanly. I test overlap on practice skin to confirm registration and negative space relationships. I use temporary adhesives or skin tack when multiple stencil layers must match precisely. I plan ink order by contrast level so darker elements anchor composition then lighter elements refine texture. I photograph each transfer stage for records and repeatability.
Care And Aftercare Considerations
I outline practical steps that protect stencil integrity and support reliable healing.
Skin Prep And Stencil Longevity
I wash the area with an antibacterial soap and water to remove oils and debris.
I shave hair with a fresh disposable razor when needed to create a flat surface.
I degrease the skin using a medical-grade transfer solution or 70% isopropyl alcohol to improve adhesion.
I position the stencil and confirm alignment with body landmarks before applying pressure.
I press the stencil evenly and remove backing after 30 to 60 seconds to ensure full transfer.
I allow stencils to dry for at least 2 minutes before starting work to prevent smudging.
I seal multi-pass stencils with a light barrier film if the session will exceed 90 minutes to protect edges.
I document stencil orientation and layer order for follow-up sessions to preserve design continuity.
Sources: Society of Tattoo Artists stencil transfer guidelines.
Ensuring Clean Transfer And Healing
I use single-use transfer paper and fresh gloves to prevent cross-contamination.
I keep work surfaces sterile with an EPA-registered surface disinfectant between clients.
I tattoo over the stencil promptly because prolonged exposure to body oils reduces contrast.
I blot excess stencil ink with sterile gauze rather than rubbing to avoid distortion.
I give clients a printed aftercare sheet that lists cleaning frequency and restricted activities.
I recommend cleaning the tattoo twice daily with mild soap and lukewarm water for 2 weeks then applying a thin layer of approved ointment or lotion.
I advise avoiding soaking, direct sun, and strenuous friction during the first 14 days to minimize scabbing and pigment loss.
I schedule a 6 to 8 week touch-up if necessary because healed contrast may change after initial healing.
Sources: Centers for Disease Control and Prevention wound care principles, Society of Tattoo Artists aftercare standards.
Legal And Ethical Considerations
I cover legal and ethical issues that affect stencil use. I focus on copyright, originality, consent, and ownership.
Copyright And Originality Concerns
I respect copyright when I use or adapt artworks. Copyright protects original artistic works from unauthorized copying and derivative works, according to the U.S. Copyright Office [1].
I verify originality before I convert art into a stencil, and I do one of the following when art is not mine:
- Obtain permission from the copyright holder.
- Use public domain works that predate 1929 or works explicitly released under a permissive license.
- Create a sufficiently original derivative that transforms the source so it qualifies as new under copyright law.
I document permissions and licenses, and I store them with the client file. I note date, scope of use, and any restrictions. I avoid relying on short verbal agreements because verbal consent is harder to prove in disputes.
I follow best practices for attribution when required by license terms. I document my creative contributions when I transform a reference into an abstract stencil, and I save process files that show sketches, edits, and vector path changes.
Sources
- U.S. Copyright Office [1]
Client Consent And Design Ownership
I get written consent from clients for stencil use and design changes. I use a simple release that states ownership terms, reproduction rights, and agreed usage for photos and promotion.
I present two standard ownership models and record the chosen option:
- Artist retained with client usage rights: I keep copyright, client gets unlimited personal use and reproduction for noncommercial purposes.
- Client transferred ownership: I assign copyright in writing with clear payment terms and scope of transfer.
I explain commercial use to clients, and I obtain separate agreements for merchandise, licensing, or third‑party reproduction. I keep signed releases, forms, and proof of payment together for at least five years.
I handle disputes by documenting the design process, retaining all drafts, and consulting a copyright attorney when necessary.
- Professional tattoo industry guidelines and copyright practice recommendations [2]
Conclusion
I trust this guide helps you approach abstract tattoo stencils with more confidence and clarity. Whether you design them or apply them I want you to feel empowered to make choices that honor both the art and the skin.
If you have a concept ready or want feedback on a stencil send it my way. I can help refine scale placement or transfer technique so your next session runs smoother and looks sharper.
Frequently Asked Questions
What are abstract tattoo stencils?
Abstract tattoo stencils are template outlines that translate nonrepresentational art—shapes, lines, color blocks—into skin-ready patterns. They guide precise placement and reproducible designs while preserving negative space and composition.
How do stencils differ from freehand tattooing?
Stencils provide reproducibility, precision, speed, and predictability; freehand is more spontaneous and organic. Use stencils for consistency and complex layouts, freehand for flowy, site-responsive work.
What are the main benefits of using abstract stencils?
Benefits include consistent line placement, saved chair time, reduced human error, easier multi-pass layering, and reliable reproduction of complex compositions across sessions.
What types of abstract stencils exist?
Three main types: geometric/line-based (precision), organic/fluid (movement and flow), and mixed-media/hybrid (layered texture and depth).
How do I choose the right stencil scale?
Measure against body landmarks, test on practice skin, and aim for proportional negative space. Consider movement areas—wider scale for limbs, tighter scale for joints or small placements.
How should I place a stencil on the body?
Align design flow with muscle lines and anatomical curves, balance negative space, and preview with temporary transfers; make micro-adjustments before tattooing.
How do I test a stencil transfer?
Do a dry transfer on practice skin or fake skin, check line clarity and fit, then adjust digital paths or scaling before final transfer.
How do I prepare skin for a stencil?
Wash, shave, and degrease the area; apply skin-safe stencil transfer solution and ensure skin is dry and flat before applying the stencil.
What are best practices for cutting and sealing stencils?
Vector-clean paths, cut with clean edges, test dry transfers, and seal with appropriate barrier sprays for long sessions to prevent smudging.
How do I handle layered or complex stencils?
Break designs into numbered passes, plan ink/contrast order, and document pass sequence to maintain alignment and negative space across sessions.
How much time can stencils save in a tattoo session?
Using stencils can reduce placement and redraw time from 30–60 minutes to 5–15 minutes, shortening overall chair time and improving workflow.
What aftercare should clients follow for stencil-based tattoos?
Keep the area clean, follow the studio’s ointment and bandage instructions, avoid soaking and heavy exercise during initial healing, and monitor for signs of infection.
What legal and ethical issues relate to stencil use?
Respect copyright and originality—obtain permission for adapted artwork, document client agreements, and be clear about ownership and usage rights in writing.
How should artists customize stencils for different skin types?
Simplify dense linework for textured or loose skin, adjust contrast and scale for tone and elasticity, and test transfers to ensure legibility before tattooing.
Who owns a stencil design?
Ownership depends on agreement: artists may retain rights, or clients may buy design ownership. Always use written agreements to specify usage, reproduction, and copyright terms.