I love turning abstract concepts into tattoo templates that guide precision and spark creativity. In this piece I show practical grid setups guide techniques and overlay ideas that help both artists and clients visualize balance scale and flow before the needle touches skin.
I’ll walk you through easy to use templates that save time reduce mistakes and improve consistency. Expect clear examples step by step tips and smart overlays that make abstract designs repeatable and refined.
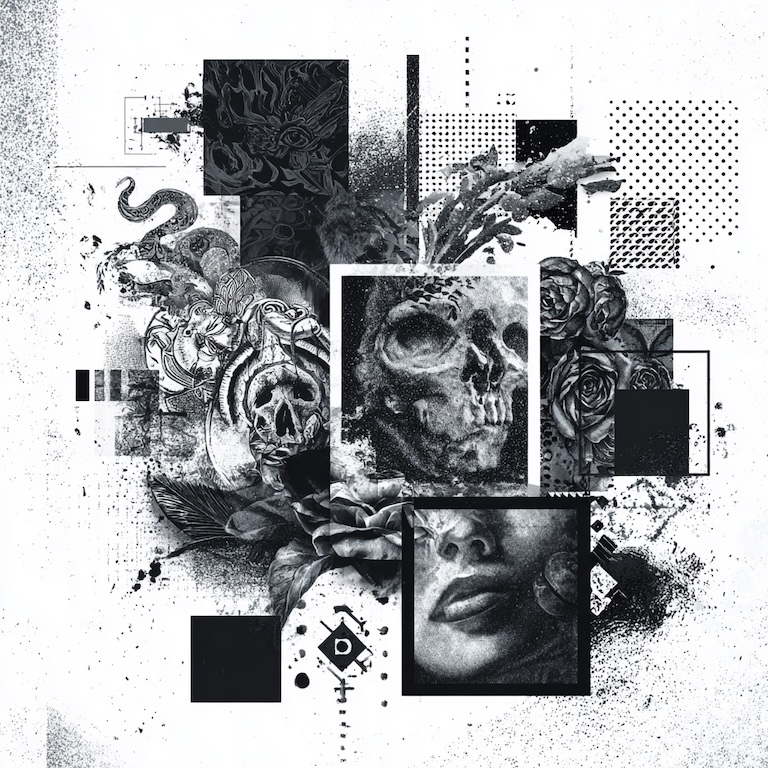
Abstract Tattoo Design Template Ideas: Grids, Guides, and Overlays for Precision
I translate abstract concepts into repeatable templates that keep scale, balance, and flow consistent while preserving creative freedom.
- Grid: I use modular grids for placement and proportion.
- Grid details: 3×3, 6×6, and 12×12 modules for small, medium, and large pieces.
- Grid benefit: Grids anchor abstract shapes so repetition stays accurate.
- Guide: I apply directional guides for flow and muscle alignment.
- Guide details: radial guides for limbs, curvature guides for torsos.
- Guide benefit: Guides align abstract strokes with anatomy for natural motion.
- Overlay: I layer overlays for texture, shading, and negative space checks.
- Overlay details: 25% to 75% opacity layers for color and value tests.
- Overlay benefit: Overlays preview depth and contrast before inking.
Templates I provide include vector stencils and raster mockups so artists can scale without loss of detail. I export templates as SVG for vectors and PNG at 300 DPI for raster use.
Step-by-step tips I follow for precision
- Measure: I measure reference points in millimeters then map them to the grid.
- Align: I align key motifs to vertical or horizontal guides then adjust for curvature.
- Test: I print mockups at 100% scale then place them on a life-cast or model.
- Calibrate: I calibrate needle grouping and line weight against the template before starting the session.
Examples and use cases
- Small motifs: geometric fragments aligned to a 3×3 grid for wrist and ankle.
- Medium pieces: flowing abstracts using 6×6 grids with radial guides for arm wraps.
- Large compositions: full-back abstracts built on 12×12 grids with multiple overlays for depth.
Precision metrics table
| Metric | Value | Purpose |
|---|---|---|
| Grid sizes | 3×3, 6×6, 12×12 | Scale templates to body area |
| Print resolution | 300 DPI | Match skin detail and stencil clarity |
| Overlay opacity | 25%–75% | Preview shading and value |
| Line weight range | 0.3 mm–1.2 mm | Simulate fine to bold strokes |
| Template formats | SVG, PNG | Preserve scalability and compatibility |
Resources I reference for design accuracy include grid theory and layout best practices (Interaction Design Foundation: https://www.interaction-design.org). I follow hygienic stencil reproduction techniques used in professional tattoo practice to maintain template fidelity and safety.
Why Use Templates For Abstract Tattoos
I use templates to turn loose concepts into repeatable tattoos and to ensure precision when working with complex layouts.
Benefits Of Structure In Abstract Design
- Reduce placement errors by anchoring motifs to grid points and guides.
- Improve scale consistency across sessions by using set grid sizes and vector templates.
- Speed stencil production when I reuse overlays and modular components.
- Enhance client communication by showing scaled mockups before inking.
- Preserve design intent when collaborating with other artists by sharing SVG or 300 DPI PNG files.
When To Use Templates Versus Freehand
I use templates when precision, repetition, or client approval matters, and I go freehand when organic flow or spontaneous texture is the priority.
- Use templates for symmetrical motifs, repeatable patterns, and large compositions that require exact alignment.
- Use templates for work that must match previous tattoos or multiple-session pieces.
- Use freehand for fluid brushstroke effects, one-off textures, and when anatomy demands adaptive variation.
- Use freehand when skin movement or client positioning will alter the design dynamically.
Core Elements: Grids, Guides, And Overlays
I map core elements that make abstract tattoo templates precise and repeatable. I focus on grid geometry guide axes and overlay layering to ensure placement scale and texture translate from paper to skin.
Grid Types And How They Influence Composition
- Grid 3×3: Use for small motifs and quick alignment. Examples: wrist symbols, finger bands.
- Grid 6×6: Use for medium pieces and modular repeats. Examples: forearm panels, shoulder pads.
- Grid 12×12: Use for large compositions and complex repeats. Examples: back pieces, full sleeves.
| Grid type | Recommended print scale | Best use |
|---|---|---|
| 3×3 | 1:1 at 300 DPI | small motifs |
| 6×6 | 1:1 or 2:1 at 300 DPI | medium modules |
| 12×12 | 1:1 at 300 DPI | large compositions |
I pick a grid based on visible negative space and repetition needs. I test a mockup on a photographed body area to confirm fit before making a stencil.
Guide Lines, Symmetry Axes, And Focal Points
- Guide lines: Place directional strokes to follow muscle and bone. Examples: clavicle line, forearm axis.
- Symmetry axes: Mark bilateral centers for mirrored motifs. Examples: spine midline, chest center.
- Focal points: Define one primary anchor and two secondary anchors to guide viewer flow. Examples: eye node, intersection of major lines.
- I draw axes first and add motifs second so balance is maintained. I measure key distances in millimeters and note them on the template for repeatable placement.
Overlay Techniques For Layering Texture And Depth
Overlay alpha: Use 10 25 and 50 percent opacity layers to preview texture and shadow. Examples: stipple texture, soft gradient, heavy shadow.
Overlay type: Use vector overlays for line clarity and raster overlays for textured fills. Examples: SVG line sheets, PNG tonal maps.
Overlay stack: Use base grid then guide layer then texture layer to keep edits non destructive. Examples: grid base, guide lines, shading map.
I export overlays in both SVG and PNG at 300 DPI to keep scale and detail consistent. I follow hygienic stencil reproduction guidance from the Alliance of Professional Tattooists for template safety.
Design Workflow Using Templates
I map template steps to body topology and workflow stages. I keep each step concise to preserve precision and speed.
Setting Up Templates For Different Body Areas
I size grids to match local curvature and visible landmarks. I use the 3×3 grid for small areas like wrists forearms. I use the 6×6 grid for medium areas like shoulders calves. I use the 12×12 grid for large areas like backs chests.
- Align grid lines with anatomical axes.
- Anchor focal points to bony landmarks.
- Adjust node spacing for curvature distortion.
I print templates at 100 percent scale for direct stencil transfer when the stencil sits flat and fit scaling to the skin is required. I test placements on a clear acetate mockup when skin tension is high.
Iterating Designs While Preserving Precision
I document each revision on layered files so measurements remain consistent. I lock key anchor points before altering motifs. I test each iteration on a low-opacity overlay before committing to final lines.
- Save iteration as new layer.
- Measure anchor distances after each change.
- Compare current layer to original grid using overlay opacity.
I record needle and distance calibrations when scaling a design to a different body area so reproduction matches the template dimensions.
Tools, Software, And Materials
I pick tools that balance precision and workflow speed. I choose software and materials that map design intent to skin reliably.
Digital Tools And Apps For Creating Templates
- Use Adobe Illustrator for vector templates and precise grids.
- Use Affinity Designer for lower-cost vector editing and artboards.
- Use Procreate for raster sketches and on-body mockups on iPad.
- Use Clip Studio Paint for pressure-sensitive brush control and halftone overlays.
- Use Inkscape for free SVG exports and node-level adjustments.
- Use Photoshop for raster mockups and texture overlays.
- Use a Wacom or Apple Pencil for pressure accuracy when drawing curves.
- Use a color-calibrated monitor for consistent color and contrast across devices.
I export vectors as SVG for scalability and PNG at 300 DPI for print, if clients want physical proofs.
Print, Transfer, And Tattoo-Ready Materials
- Use thermal stencil paper for direct machine stencils and crisp line transfer.
- Use carbon transfer paper for hand-traced templates and quick mockups.
- Use stencil transfer gel for wet transfers when surface adhesion matters.
- Use matte waterproof paper for test prints and trial placements.
- Use acetate overlays for repeatable layer alignment and opacity tests.
- Use medical-grade adhesive spray for temporary mockups on skin for final approval.
- Use single-use stencil sheets to reduce cross-contamination risk.
| Setting | Recommended value | Example use |
|---|---|---|
| Print resolution | 300 DPI | client hand proofs |
| Overlay opacity | 20–70% | shading and texture previews |
| Line weight range | 0.5–3 pt | fine line to bold elements |
| Template formats | SVG, PNG, PDF | vector, raster, print-ready |
I follow OSHA guidance for hygiene when I handle transfer materials and I document stencil settings for repeatability.
Tips For Balancing Precision With Artistic Freedom
I prioritize exact guides while I preserve room for expressive strokes. I use templates to lock structure, then I allow improvisation during inking.
Adapting Templates For Unique Anatomy And Movement
I map bony landmarks first to anchor templates to consistent points (sternum, iliac crest, lateral epicondyle). I measure curvature with a flexible ruler then translate node spacing to the template. I increase node density on high-curvature zones such as shoulders and rib cages then reduce density on flat areas such as the forearm. I place directional guides along muscle fiber lines to support natural flow during movement (Gray’s Anatomy). I create dynamic overlays that show three states sitting standing and reaching so the design reads in real positions. I print a 1:1 mockup then test the stencil on the client while they perform target motions so I confirm placement and scale. I adjust opacity and line weight for skin texture variations then I document the final settings for repeatable transfers.
Common Pitfalls And How To Fix Them
- Misaligning grids: Recenter the grid on a bony landmark then verify symmetry with a quick caliper check.
- Ignoring skin stretch: Anchor the stencil with reference marks then position the client in the anticipated final pose.
- Overly dense guides: Simplify node points then use overlays to indicate secondary details.
- Losing flow to strict geometry: Add a flow layer with freehand strokes then lock key anchor lines only.
- Inconsistent line weight: Standardize line weights in the template file then export at 300 DPI SVG for vectors and PNG for rasters.
- Poor stencil fidelity: Switch to thermal stencil paper and wet transfer gel then test a small area to confirm clarity (Journal of Biomechanics 2016).
- Forgetting documentation: Save a copy of the applied stencil image then record measurements of scale and rotation for future sessions.
I hope this guide sparks new ways for me and you to think about precision and play in abstract tattooing. I encourage experimentation with templates while staying mindful of anatomy and workflow.
If you try the templates share your results and adjustments so we can refine them together. My goal is to keep tools practical and flexible so your art stays consistent and alive.
Frequently Asked Questions
What are tattoo templates and why use them?
Tattoo templates are pre-designed guides (grids, overlays, motifs) used to plan placement, scale, and flow. They save time, reduce placement errors, improve consistency, and help communicate design intent clearly between artist and client.
Which grid size should I use for different tattoo sizes?
Use a 3×3 grid for small motifs, a 6×6 grid for medium pieces, and a 12×12 grid for large compositions like back or chest work. Match grid density to the level of detail and area curvature.
How do guide axes and overlays improve tattoo flow?
Guide axes align strokes with anatomy and natural movement; overlays preview texture, shading, and depth. Together they ensure strokes follow body contours and maintain visual balance before inking.
What file formats do you provide for templates?
Templates are available in vector (SVG, AI) and high-resolution raster (PNG 300 DPI). Vectors scale without quality loss; 300 DPI PNGs are ideal for printing and stencil production.
How do I transfer templates to skin safely?
Use thermal stencil paper or carbon transfer with wet transfer gel, or digital projection. Sanitize skin, use medical-grade adhesive if needed, and follow hygienic stencil reproduction techniques to reduce infection risk.
How should I set stencil opacity and line weight?
Print stencil lines at moderate opacity for clarity; recommended line weight ranges depend on design but typically fall between 0.5–2.0 pt (vector) or 1–4 px (raster at 300 DPI). Adjust for skin tone and detail level.
When should I use templates versus freehand?
Use templates for symmetrical motifs, repeatable patterns, and large pieces needing exact alignment. Choose freehand for fluid brushstroke effects, adaptive variations, and responsive work to skin movement.
How do I adjust templates for curved anatomy?
Map bony landmarks, measure curvature, and modify node spacing or grid distortion to compensate. Anchor focal points to anatomical landmarks and test mockups on curved surfaces before finalizing.
What tools and software are best for creating templates?
Common tools: Adobe Illustrator for vector templates, Procreate for raster sketches, and Clip Studio Paint for pressure-sensitive brush control. Use design apps that support layers and export to SVG/PNG.
How do overlays help with shading and depth planning?
Layering overlays at varying opacities lets you preview texture, gradient, and depth without committing ink. This helps refine contrast, shadow placement, and transition areas before tattooing.
What are common stencil mistakes and how to fix them?
Typical issues: misaligned grids, too-light stencils, and poor adhesion. Fix by re-measuring anchor points, increasing line contrast, reapplying stencil with proper transfer gel, and checking alignment before tattooing.
How can templates speed up collaboration and revisions?
Templates standardize measurements and anchors, making revisions traceable and shareable. Artists and clients can iterate faster using consistent grids, recorded metrics, and versioned template files.
How do I preserve template precision during iteration?
Document measurements, keep layered source files, record changes and node positions, and always export updated vectors or high-res PNGs. Use consistent print settings and calibration to maintain fidelity.
Are there hygiene tips when handling stencil materials?
Always wear gloves, use disposable or sterilizable tools, choose medical-grade adhesive sprays, and follow studio sterilization protocols when handling thermal paper, transfer gels, and stencils.
How do I calibrate needle settings based on templates?
Test needle depth and line weight on practice skin using your template lines. Start with conservative depth, adjust for line clarity and saturation, and document settings for repeatability across similar designs.