Tired of the same old tattoo styles that scream “I got this in five minutes”? Let’s talk about dotwork tattoo design sleeves—a style that’s all about patience, precision, and a little bit of pointillism magic. These sleeves aren’t just tattoos; they’re like wearable works of art made up of thousands of tiny dots that come together to create stunning patterns and images.
Materials and Tools Needed for Dotwork Tattoo Sleeves
Mastering the dotwork tattoo sleeve technique requires precision tools and quality products. Our selection of materials targets maximum control and crisp detail for those thousands of tiny dots.
Tattoo Machines and Needles Suitable for Dotwork
Choose rotary tattoo machines for their smooth, consistent performance that supports the slow, deliberate pace demanded by dotwork. Complement machines with single needle configurations ranging from 1RL (round liner) to 3RL for varied dot sizes and shading effects. Opt for needles with tight groupings for precision in detailed areas and looser setups for gradient effects.
Ink Types and Colors Used in Dotwork Tattoos
Select black carbon-based inks for their deep pigmentation and longevity essential in dotwork’s subtle shading variations. Include grey wash inks diluted at 25%, 50%, and 75% concentrations to enable smooth transitions and shadowing. Incorporating waterproof, organic-based inks helps reduce skin irritation while amplifying dot visibility and contrast.
Aftercare Products Recommended for Dotwork Tattoos
Prioritize fragrance-free antibacterial ointments like those containing allantoin to foster skin healing without clogging pores. Use moisturizing creams with natural ingredients such as shea butter or aloe vera to maintain hydration and prevent dot blurring. Recommend breathable tattoo bandages in the initial 24 hours to protect the fine dot layers without suffocating skin.
Designing Your Dotwork Tattoo Sleeve
Dotwork tattoo sleeves demand patience and precision. Crafting a cohesive design requires smart planning and creative collaboration.
Planning the Overall Sleeve Layout
Sketch the sleeve’s flow from shoulder to wrist. Organize elements into large focal points and connecting patterns. Balance dense dot clusters with open skin spaces. Visualize the sleeve in sections—upper arm, elbow, forearm—while considering how each part interacts. Prioritize skin texture and natural muscle curves for seamless ink placement.
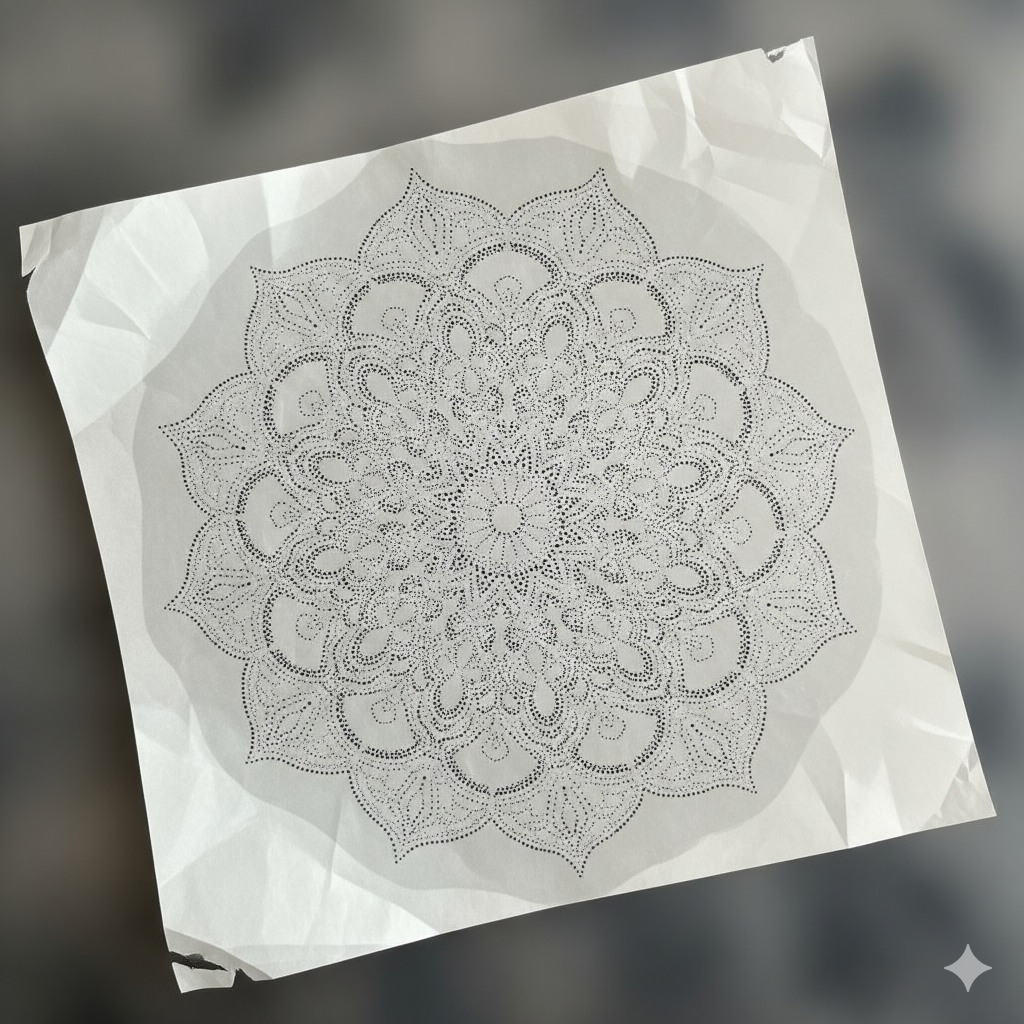
Choosing the Right Patterns and Motifs
Select geometric shapes, mandalas, or nature-inspired motifs like leaves and flowers. Mix symmetrical patterns with organic forms for dynamic contrast. Opt for high-contrast shading with black and grey wash inks to amplify depth. Avoid overly complex details too small for dotwork resolution.
Combining Dotwork with Other Tattoo Styles
Blend dotwork with linework borders, stippling, or watercolor splashes in complementary colors. Integrate tribal or minimalist elements if you want visual diversity. Ensure transitions between styles remain smooth to maintain sleeve harmony.
Working with Your Tattoo Artist on Custom Designs
Collaborate closely with your tattoo artist to translate your ideas into dotwork reality. Bring visual references and be open to suggestions about dot density and needle configurations. Communicate about pain tolerance and session length since dotwork can be time-consuming. Trust their expertise to customize pattern placement tailored to your anatomy.
Step-by-Step Process of Creating a Dotwork Tattoo Sleeve
Mastering a dotwork tattoo sleeve demands steady hands and laser focus. Following these steps guides us through skin prep, dot application, layering, and managing the marathon sessions ahead.
Preparing the Skin and Stencil Application
We start by thoroughly cleaning the skin using antibacterial soap and rubbing alcohol. This guarantees optimal ink adherence and minimizes infection risks. After drying, we position the stencil carefully, aligning it with muscle contours to maintain design flow from shoulder to wrist. Applying a gentle pressure with a transfer solution ensures crisp stencil lines that survive the needle’s assault. If the stencil smudges or tears we redo immediately, because clarity beats creativity.
Techniques for Creating Precise Dotwork Shading
We employ the single-dot technique by depositing individual dots at measured distances to form gradients. Consistent needle depth prevents excessive bleeding and maintains dot uniformity. Overlapping dots slightly creates smooth shading transitions while denser dot clusters produce bold focal points. Adopting a controlled hand motion, steady rhythm, and calibrated machine speed enhances precision. If mistake dots appear, we adapt by using them as part of texture or incorporate corrective patterns.
Layering and Depth in Dotwork Sleeve Tattoos
We build visual depth by layering multiple dotwork passes, increasing density in shadow areas while leaving highlights sparse or untouched. Each layer dries partially before adding another, preventing ink bleeding and skin trauma. Varying dot size and spacing offers contrast, guiding the eye along tattoo contours. Interspersing open spaces between layers provides skin breathing room and accentuates the intricate detailing. If skin irritation emerges we pause layering and soothe before proceeding.
Time Management and Multiple Sessions
We divide the sleeve into segments, balancing work intensity with client endurance. Sessions typically last 3 to 5 hours depending on pain tolerance and skin reaction. Scheduling several appointments spaced over weeks facilitates healing and prevents dot blowout. We reserve final sessions for detailing and touch-ups to ensure crispness and design harmony. If unforeseen delays occur we communicate openly and adjust appointments, because punctuality correlates with perfection.
Aftercare for Dotwork Tattoo Sleeves
Mastering dotwork tattoo sleeves doesn’t stop after the last dot lands. Protecting our sleeved masterpieces requires smart aftercare strategies that keep the dots sharp and the skin happy.
Immediate Care Post-Tattooing
Start by gently patting the tattoo dry with clean paper towels; rubbing off the ink like trying to erase a bad text only worsens the damage. Apply a thin layer of fragrance-free antibacterial ointment—think of it as a superhero shield for your new art. Avoid tight clothing that turns the sleeve into a sauna; breathable fabrics win the day. Keep the freshly tattooed arm elevated when possible unless you’re practicing your new dance moves, which we officially discourage.
Long-Term Maintenance for Dotwork Tattoos
Hydration remains the MVP—apply a moisturizing cream without perfumes or dyes at least twice daily for the first two weeks to maintain skin elasticity and dot clarity. Limit soaking in baths or swimming pools for at least 14 days, because turning your sleeve into a water park guarantees unwanted patchiness. Sun exposure acts like a sneaky photobomber, stealing the tattoo’s brilliance; always coat it with at least SPF 30 sunscreen whenever we venture outdoors post-healing.
Avoiding Fading and Preserving Dotwork Details
Preserve intricate dot clusters by wearing loose layers over your sleeve to reduce friction, or risk turning those tiny dots into a big blur. Schedule touch-up sessions if any area seems to lose its pop—dotwork perfection requires periodic maintenance, sort of like tuning a vintage car. Avoid abrasive exfoliants on tattooed skin; we want to keep dots intact not give them a sandblasted makeover.
Troubleshooting Common Issues in Dotwork Tattoo Sleeves
Dotwork tattoo sleeves bring spectacular detail but sometimes encounter hiccups during and after application. Let’s tackle these common challenges with precision and a splash of humor.
Dealing with Uneven Dotwork or Blotchy Areas
Uneven dotwork or blotchy patches create unintentional abstract art nobody asked for. Fix uneven dot distribution by applying inconsistent pressure or needle depth, as consistent needle depth and steady hand speed produce uniform dots. If blotchiness appears due to ink pooling or skin swelling, wait for complete healing before assessing correction needs since swelling can distort early appearances. Cover up blotchy spots using dense layering of dots with slightly smaller needle groupings in subsequent sessions to blend imperfections smoothly.
Handling Skin Irritation or Allergic Reactions
Skin irritation turns our masterpiece into a drama scene no one enjoys. React to swelling redness or rash by immediately stopping tattoo sessions and applying fragrance-free antibacterial ointment in thin layers. If irritation persists beyond 72 hours or worsens, consult a dermatologist because allergic reactions to certain inks, especially black carbon-based ones, might require professional intervention. Avoid scratching as it risks infection and patchy healing.
When to Seek Professional Touch-Ups
Touch-ups save dotwork sleeves from looking like abstract sketches gone wrong. Seek professional touch-ups if dots fade unevenly or lines lose crispness after healing, typically 4 to 8 weeks post-tattoo. Schedule touch-ups during cooler months since sun exposure accelerates fading. Be upfront about problem areas with your tattoo artist for precise fixes, avoiding overworking the skin which can cause texture changes.
Tips and Best Practices for Dotwork Tattoo Design Sleeves
Mastering dotwork tattoo sleeves demands more than just a steady hand. Precision, customization, and expert guidance serve as our best friends throughout this intricate journey.
Choosing Experienced Dotwork Tattoo Artists
Selecting artists who specialize in dotwork guarantees a fine-tuned touch. Focus on portfolios showcasing consistent dot spacing, balanced shading, and clean lines. Prioritize professionals with at least 3 years of dotwork tattoo experience and positive client reviews. Remember that a skilled artist understands needle depth, pressure variation, and layering nuances, preventing patchy or blurry designs. Scheduling a consultation gives us a glimpse of their process and lets us discuss our vision without committing on a whim.
Customizing Designs to Fit Arm Anatomy
Adapting dotwork designs to individual arm contours emphasizes flow and harmony. Measure the arm circumference and note muscle bulges or bone prominences before sketching. Align patterns like mandalas or geometric shapes with natural curves, avoiding distortion over joints. Design balance emerges by placing focal points where muscle groups create natural highlights or shadows. Utilizing negative space strategically prevents overcrowding and enhances visual breathing room. Tailoring the sleeve design to our unique anatomy preserves the artwork’s crispness even when the arm moves or flexes.
Alternative Methods: DIY Dotwork Tattoos and Temporary Options
Experimenting with DIY dotwork tattoos involves stencil use and fine-tipped markers or temporary tattoo pens. Apply in small sections to maintain dot precision without overwhelming the skin’s surface. However, replicating professional needle depth and ink saturation remains challenging outside a studio environment. Temporary dotwork tattoos using henna or skin-safe dyes offer an injury-free preview of sleeve placement and design style. These can last 1 to 3 weeks depending on skin type and aftercare measures like avoiding exfoliation and prolonged water exposure. While temporary options lack the permanence, they provide us with flexibility and a chance to commit to our artistic dot patterns before the needle touches skin.
Conclusion
Dotwork tattoo sleeves aren’t just a style—they’re a commitment to patience, precision, and a whole lot of tiny dots. Whether you’re ready to dive in with a pro artist or just testing the waters with some henna experiments, there’s a world of creativity waiting to wrap around your arm.
Remember, it’s not just about looking cool (though you’ll definitely nail that). It’s about embracing the process, trusting the experts, and giving your skin the TLC it deserves. So gear up, dot by dot, and let your sleeve tell a story that’s uniquely yours—one tiny point at a time.
Frequently Asked Questions
What is a dotwork tattoo sleeve?
A dotwork tattoo sleeve is a type of tattoo covering the arm that uses thousands of tiny dots to create intricate patterns and images, offering a detailed and artistic alternative to traditional tattoo styles.
What tools are needed for dotwork tattooing?
Essential tools include rotary tattoo machines with specific needle configurations for precision, high-quality black carbon-based and grey wash inks, and proper sterilized equipment to ensure detailed and safe work.
How should I prepare my skin before getting a dotwork tattoo sleeve?
Clean and shave the area, then apply the stencil carefully. Proper skin preparation ensures optimal ink adherence and reduces irritation during tattooing.
How is shading achieved in dotwork tattoos?
Shading is done using the single-dot technique with consistent needle depth, gradually layering dots to build depth and subtle gradients without harsh lines.
Can dotwork be combined with other tattoo styles?
Yes, dotwork can blend smoothly with linework and watercolor styles, but careful planning is needed to maintain visual harmony and seamless transitions.
What aftercare is recommended for dotwork tattoo sleeves?
Use fragrance-free antibacterial ointments initially, then keep the skin moisturized. Avoid tight clothing, excessive water exposure, and apply sunscreen to protect the tattoo.
How many sessions are usually needed for a dotwork sleeve?
Dotwork sleeves are typically done in multiple sessions, allowing for manageable sections, proper healing, and maintaining detail and design integrity.
What common issues may occur with dotwork tattoos and how are they fixed?
Issues like uneven dots or blotchiness often result from inconsistent needle depth. Waiting for healing before touch-ups and consulting a professional can resolve most problems.
How can I choose the right dotwork tattoo artist?
Look for artists specializing in dotwork tattoos, review their portfolios and client feedback, and ensure they understand pattern placement and customization for your anatomy.
Are there temporary alternatives to permanent dotwork tattoos?
Yes, you can experiment with stencils and fine-tipped markers or use henna designs to try dotwork styles before getting a permanent tattoo.