Choosing a tattoo design can feel like trying to pick your favorite pizza topping—there are just too many awesome options! But if you’re looking for something that’s both striking and a little bit different, dotwork tattoo designs might just be our new best friend. These intricate designs use tiny dots to create stunning patterns that look like they took forever to make (because, well, they probably did).
Materials and Tools Needed for Dotwork Tattoo Design
Mastering dotwork tattoo design requires precision tools and materials. We gather the right supplies for clean and consistent dot patterns.
Essential Drawing Supplies
- Fine-tip pens like Micron or Staedtler create crisp dots for sketching detailed templates.
- Smooth Bristol paper withstands repeated dotting without bleeding or tearing.
- Lightbox helps trace initial sketches with consistent dot placement.
- Mechanical pencils offer controlled line work to guide dotwork placement.
- Ruler and compass keep geometric designs perfect when dots form intricate shapes.
Recommended Tattoo Equipment for Dotwork
| Tattoo Tool | Feature | Purpose |
|---|---|---|
| Rotary tattoo machine | Low noise, smooth needles | Enables steady dot punctures |
| Liner needles (3-5) | Fine grouping for tight dot clusters | Creates dense and delicate dots |
| Black tattoo ink | High pigment concentration | Ensures bold and lasting dots |
| Tattoo grip and tubes | Comfortable and ergonomic design | Maintains steady hand control |
| Stencil paper | Transfers tattoo template onto skin | Guides accurate dot placement |
We focus on equipment that promotes precision since dotwork demands consistent tiny dots spaced exactly right to form stunning detail.
Understanding the Fundamentals of Dotwork Technique
Mastering dotwork demands a keen eye for detail and a steady hand. Our art relies on precise dot placement and clever shading methods that transform tiny points into mesmerizing scenes.
Dot Placement and Shading Methods
Start dot placement with consistent spacing. Tight clusters create darker areas while spread-out dots keep it light. Vary dot density to design smooth gradients that fool the eye without needing a paintbrush. Use stippling patterns like circular, linear, and random arrangements for a tattoo that pops instead of just looks like someone lost a dice game. Keep dot size uniform unless aiming for emphasis; bigger dots highlight, smaller dots fade. Steady the hand with wrist support and stick to liner needles for sharp, clear dots.
Creating Depth and Texture Through Dotwork
Depth appears when foreground dots stay larger and clearer while background dots shrink and blur slightly, mimicking natural focus. Layer dot groups with different densities and sizes to build texture that feels tactile, almost like you could poke it and it’d wiggle. Cross-hatching with dots—yes, dot-hatching—is the secret sauce for adding contrast and detail complexity. Shadows form naturally as dot clusters turn dense balancing bright open spaces elsewhere. Balance black space and dense dot areas to prevent your tattoo from looking like a starry night gone wild.
Brainstorming Dotwork Tattoo Design Ideas
Dotwork tattoos offer endless possibilities. We explore distinctive concepts to spark creativity and customize unforgettable designs.
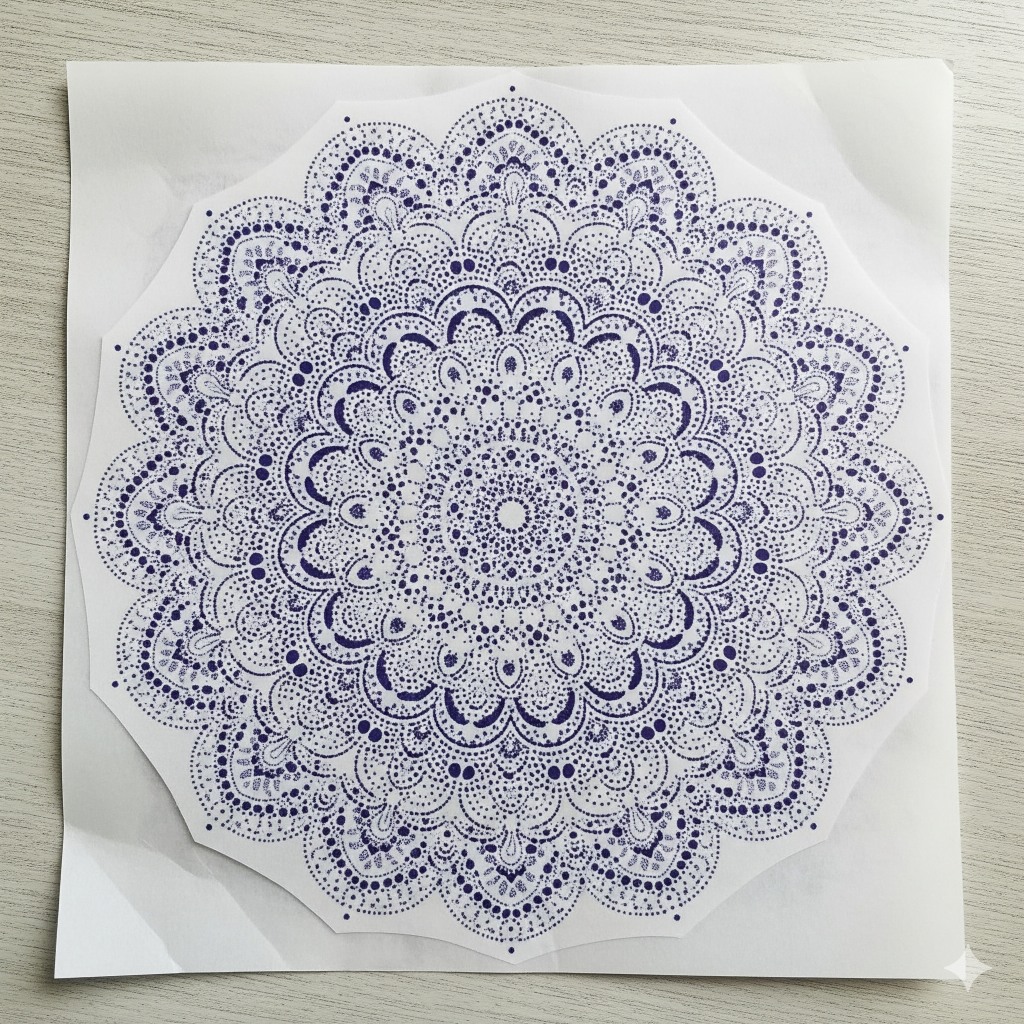
Geometric Patterns and Mandalas
Draw geometric patterns featuring precise lines and repetitive shapes, each formed by intricate dot clusters. Craft mandalas using concentric circles and symmetrical shapes, radiating calm vibes. Use overlapping triangles, hexagons, or spirals to build mesmerizing illusions. Layer dot density to differentiate foreground from background elements. Incorporate small dots for delicate details and larger ones for bold outlines to enhance visual depth.
Nature-Inspired Elements: Flowers, Animals, and Landscapes
Sketch flowers like roses, lotuses, or daisies, emphasizing petal texture through varied dot spacing. Render animal portraits by blending fine stippling with tonal gradients for realistic fur or feathers. Illustrate natural landscapes such as mountains, forests, or ocean waves, using dot clusters to mimic light and shadow. Apply larger dot groups for darker areas like shadows beneath leaves and smaller dots for sunlit sections to create dynamic contrast.
Abstract and Minimalist Dotwork Concepts
Design abstract shapes focusing on balance between empty space and dot-filled areas. Encourage minimalistic ideas like single-line figures or symbolic motifs represented through dot patterns. Experiment with sparse dot placement to suggest form rather than define it. Use negative space cleverly to let the skin act as part of the artwork. Create visual tension by juxtaposing tightly packed dots next to vast open areas.
Combining Dotwork with Other Tattoo Styles
Pair dotwork with linework to add crisp edges around soft stippled shading. Fuse blackwork techniques by integrating solid black shapes intersecting dot patterns. Mesh watercolor styles by dotting along color gradients for a speckled effect. Blend realism by adding stippled shadows on photorealistic tattoos to emphasize contours. Mixing styles elevates designs, ensuring uniqueness and complexity without overwhelming the eye.
Creating Your Own Dotwork Tattoo Design Template
Crafting a dotwork tattoo design template demands patience and precision but rewards us with a personalized masterpiece. Below are practical steps to bring those tiny dots into glorious patterns.
Sketching Basic Outlines
Start each design by sketching simple outlines using a fine-tip pencil or pen. Draw clean shapes like circles, triangles, or petals without overcomplicating. Keep lines light so they guide dot placement but won’t steal the spotlight. Map key features and symmetry carefully since every dot depends on this blueprint. Remember, even Rome wasn’t dotted in a day.
Filling Designs With Dot Shading
Fill outlined areas by layering dense dots for shadows and scattering tiny dots for highlights. Maintain consistent pressure and spacing of the dots to create smooth gradients. Work from dark to light zones progressing from dense dot clusters to airy speckles. Use stippling techniques—tiny groups of dots that form textures or depth. Imagine dotwork as a pointillist dance party where each dot earns its space without crowding the floor.
Digital vs. Hand-Drawn Templates
Draw templates by hand on smooth Bristol paper for tactile control and organic textures. Hand-drawn templates show charming irregularities that accentuate the design’s uniqueness. Alternatively, draft digitally using tablets and software that allow zoom-level precision and easy corrections. Digital templates speed adjustments and layering but risk looking too perfect and sterile unless we add deliberate imperfections. Combine both approaches if perfection and personality feel like opposites attracting.
Tips for Perfecting Dotwork Design Templates
Mastering dotwork design templates demands a sharp eye and steady hand to keep each dot on point. Let’s dive into fine-tuning techniques that keep our designs crisp and captivating.
Maintaining Consistent Dot Size and Spacing
Start each session with focused dot drills because consistent dots shape flawless patterns. Use fine-tip pens rated between 0.1 mm and 0.3 mm for uniform dot sizes. Keep spacing precise by imagining a grid or lightly sketching guide points; scattered dots scream chaos instead of art. Vary dot density, not size, to create shadows and highlights—for example, clusters of 50 dots per square inch can darken areas while 10 dots per square inch lighten them. Resist the urge to freestyle; meticulous placement spells perfection here.
Using Contrast to Enhance Design Visibility
Boost design impact by balancing dense dot clusters against bare spaces. Position heavier dotwork in foreground elements to catch the eye and scatter lighter dots for background textures—think of it as tattooing’s own form of chiaroscuro without the espresso shot. Black ink saturation must hit the sweet spot; too faint reduces visibility while too bold clogs delicate patterns. Experiment with layering dots for mid-tones rather than creating harsh lines. Designs pop best when shadows and light play along a natural gradient.
Avoiding Common Design Mistakes
Missed dots and uneven spacing rank top among design disasters. Prevent this by pausing frequently to zoom out and assess your work from a distance—our eyeballs pick up flaws like detectives on a stakeout. Avoid overcrowding dots; cramming kills flow and makes cleaning a nightmare. Resist the temptation to speed through shading; rushed dot placement translates into patchy gradients. Finally, test templates on smooth Bristol paper before tattooing because what looks perfect on screen might turn into a dotty mess on skin. We stick to these guardrails to keep dotwork elegant not embarrassing.
Applying Dotwork Tattoo Design Templates
Bringing dotwork tattoo design templates to life requires careful application and clear collaboration. We ensure smooth transfers and shared visions for perfect ink results.
Transferring Templates to Skin
Start by printing or drawing the dotwork template on transfer paper using a thermal or stencil machine. Apply a thin layer of stencil gel on the tattoo area to enhance adhesion. Position the stencil carefully, pressing firmly without shifting, then lift slowly to reveal the precise dot layout. If any section looks patchy, reapply stencil gel and repeat for sharpness. Use a green or purple stencil paper, as these contrast well with skin tones and allow easy corrections. For tricky body parts like joints, adjust stencil placement cautiously to prevent distortion during movement.
Collaborating With Your Tattoo Artist Using Templates
Share detailed dotwork templates early on with artists to ensure alignment on design density and shading nuances. Ask for artist feedback on dot size and spacing as their needle control affects final outcomes. Review stencil proofs together, discussing areas needing bolder clusters or lighter stippling to optimize visual depth. Encourage artists to test-dot stencil on practice skin for accurate needle pressure and ink flow tailored to the design’s intricacy. Clarify preferences on combining dotwork with other styles during consultations to maintain harmony. Maintain open communication throughout to tweak templates on the fly without losing the sophisticated dotwork effect.
Troubleshooting Common Challenges in Dotwork Designs
Dotwork tattoos throw curveballs even at the best of us. Tackling these common issues sharpens our skills and keeps designs dazzling.
Fixing Uneven Dot Distribution
Spotting uneven dot clusters spoils the smooth visual flow of dotwork. We steady our hand by practicing rhythm like a drummer and pacing our dots evenly across the design. Using grid guides or light pencil marks helps keep dots marching in line instead of wandering off like lost tourists. If we notice crowded patches, stepping back and thinning those areas balances the darkness without leaving awkward gaps. Remembering to switch pens or needles before they wear down maintains consistent dot size and prevents blotchiness.
Adjusting Design Scale for Different Body Areas
Sizing a dotwork design demands body-map savvy. We shrink patterns for tight spots like wrists or ankles so dots don’t blur into a mushy mess. For vault-like back canvases, we amplify details to fill space without overloading it. Keeping dot density flexible means dialing clusters up for shadowed limbs and toning them down over curves that tend to stretch ink. Testing scaled sketches on similar surfaces before inking skin guarantees that our masterpiece hugs the body perfectly, not warps like a funhouse mirror.
Alternative Methods and Styles Related to Dotwork Tattoo Templates
Exploring related techniques and styles expands our dotwork design toolkit. These alternatives offer fresh takes on shading and color that keep dotwork exciting rather than a monotonous speck-fest.
Stippling vs. Dotwork: Differences and Similarities
Stippling and dotwork share their love of tiny dots to craft shading and texture but approach it with slight personality quirks. Stippling uses random dot placement across drawings—think scattered raindrops creating soft gradients exclusively in black and white. Dotwork relies on precise, consistent dots forming detailed patterns and smooth shading across the entire tattoo canvas. Both techniques prioritize patience and dot density to convey depth but stippling often favors looser, lighter textures, while dotwork demands evenly spaced, deliberate clusters for clean geometric or pictorial effects. We rely on stippling for subtle fades and dotwork for structured visuals to keep our designs diverse and dynamic.
Using Color in Dotwork Designs
Injecting color into dotwork designs spices up otherwise monochrome masterpieces without losing dot magic. Color application involves layering vivid dots of different hues and transparencies to build gradients and contrasts, much like pixel art but with our trusty dot guns. Using colored inks demands awareness of how hues blend when dots are close or spaced apart; warm colors like reds and oranges pop dramatically while cool blues and purples mellow the vibe. We experiment with subtle color splashes to highlight focal points or full-spectrum overlays to transform classic dotwork into eye-popping spectacles. Keep color density balanced to avoid muddying the crisp textures classic dot shading delivers.
Conclusion
Dotwork tattoos might take patience and a steady hand, but hey, no great masterpiece was ever rushed—except maybe that one pizza we ordered last night. Whether you’re sketching your own template or teaming up with a pro, the magic is in those tiny dots coming together to tell a bigger story.
So let’s embrace the quirks, the perfect imperfections, and the occasional “Oops, missed a dot” moments. After all, it’s all part of the journey to creating something truly eye-catching and uniquely ours. Now, who’s ready to dot their way to tattoo greatness?
Frequently Asked Questions
What is a dotwork tattoo?
A dotwork tattoo is a style that creates detailed images using tiny dots instead of lines or shading, resulting in intricate patterns and textures.
What tools are essential for dotwork tattoo design?
Key tools include fine-tip pens, smooth Bristol paper, a lightbox for sketching, rotary tattoo machines, liner needles, and high-quality black ink.
How do you achieve shading in dotwork tattoos?
Shading is created by varying dot density—tight clusters produce darker areas, while spread-out dots create lighter effects and smooth gradients.
What are common design ideas for dotwork tattoos?
Popular ideas include geometric patterns, mandalas, nature-inspired elements like flowers and animals, abstract designs, and combinations with linework or watercolor styles.
How do you create a dotwork tattoo template?
Start with basic outlines using a fine-tip pencil or pen, then fill in with layered dot shading, balancing dense dots for shadows and scattered dots for highlights.
What are common mistakes in dotwork designs?
Typical mistakes include inconsistent dot size, uneven spacing, missed dots, and poor contrast. Taking breaks and using guides helps avoid these errors.
How can dotwork designs be transferred to skin?
Templates are transferred using stencil gel, with careful placement and collaboration with the tattoo artist to ensure accuracy and desired shading density.
Can dotwork tattoos include color?
Yes, layering colored dots can enhance visual impact while preserving the characteristic dot technique and texture of dotwork tattoos.
How do you fix uneven dot distribution in a design?
Adjust dot clusters by adding or removing dots to balance density; using grid guides and regular checks at a distance can help maintain even spacing.
What is the difference between stippling and dotwork?
Stippling uses a more random dot placement for softer gradients, while dotwork relies on precise, consistent dot patterns for detailed and intricate designs.