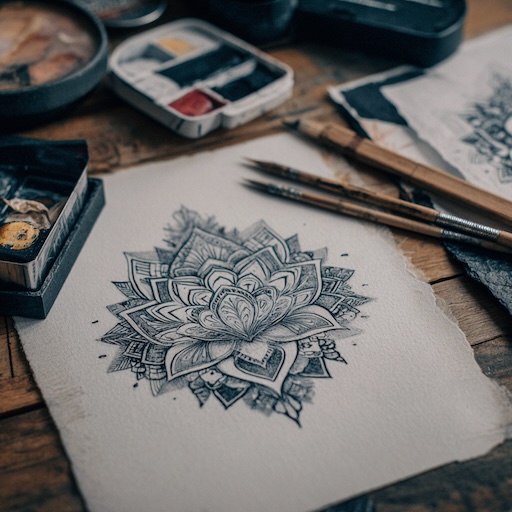
Getting a tattoo stencil just right can feel like trying to solve a Rubik’s Cube blindfolded. We’ve all been there—excited to bring a abstract tattoo design to life only to end up with a smudged mess or a stencil that refuses to stick. It’s like the stencil has a mind of its own, and not the cooperative kind.
Materials and Tools Needed for Tattoo Stencil Application
Mastering tattoo stencil application requires the right materials and tools, no magic spells needed. We break down each essential item that ensures our stencil sticks like a charm.
Stencil Paper
Stencil paper comes in a pack of three layers: top drawing sheet, middle carbon sheet, and bottom backing. We use quick and clean thermal paper types that produce crisp lines for flawless transfers. Avoid cheap or worn-out paper that smudges, or our tattoo design ends up looking like a toddler’s doodle.
Thermal Copier and Other Transfer Methods
Thermal copiers effortlessly replicate designs onto stencil paper using heat and pressure. We opt for reliable brands that prevent fading or double images. Alternatively, hand-tracing with a stylus works if the copier takes a coffee break, but steady hands matter more than caffeine here.
Stencil Application Gel or Solution
Stencil gels improve adhesion and visibility on the skin. We apply thin, even coats of solutions like Dettol or specialized transfer gels, letting the design cling without ghosting. Overapplying causes sliding; underapplying leads to patchy stencils—balance is key.
Cleaning Supplies for Skin Preparation
Clean skin is stencil-friendly skin. We prep surfaces with medical-grade antiseptic wipes or alcohol pads to remove oils and dirt. Using lotions or moisturizers beforehand sabotages stencil sticking, so keep the skin fresh and bare before application.
Other Essential Tools
Additional tools include soft cloths for blotting excess gel, precision razors for hair removal, and gloves to keep things hygienic. We avoid swapping razors mid-session; consistency helps prevent irritation or infections that ruin the artistic flow.
Preparing the Skin for Stencil Application
Perfect stencil application begins with prepping the canvas—the skin. Skipping this step guarantees the stencil acts like a rebellious toddler refusing to stick around.
Proper Cleaning and Shaving
Start by cleansing the area with an antiseptic solution to remove oils, dirt, and leftover lotion. Dab dry with a lint-free cloth because moisture turns stencil adhesion into a battle royale. Next grab a precision razor and shave the spot carefully. Hairs longer than 1/16 inch obstruct stencil transfer and create unwanted bumps. Skip this and expect your carefully crafted design to resemble a Rorschach test.
Avoiding Skin Irritations and Contaminants
Apply an alcohol-based cleanser post-shaving to kill invisible surface bugs and evaporate excess oils. Avoid products that contain heavy moisturizers or scents; they clog stencil gel and cause blotchy transfers. If the client exhibits redness or razor burn, pause until skin calms down. Tattoos prefer smooth terrain, not angry volcanoes.
Applying the Tattoo Design Stencil
Mastering the stencil application turns chaotic ink blobs into crisp art. Follow precise steps and avoid common traps to make your stencil stick like a champ.
Step-by-Step Application Process
- Position the skin area flat and stable to prevent unwanted wrinkles.
- Apply a thin, even layer of stencil gel with a soft cloth, ensuring no puddles form.
- Place the stencil paper carefully, face down onto the gel-coated skin, aligning edges with landmarks like moles or bone contours.
- Press firmly but gently for 15 to 30 seconds, avoiding sliding that smudges the design.
- Peel the stencil paper steadily, lifting at a 45-degree angle to maintain line clarity.
- Allow the stencil to air dry for at least 2 minutes before tattooing or touching.
Tips for Ensuring a Clear Stencil Transfer
- Use fresh stencil gel; expired or diluted gel weakens adhesion and detail.
- Keep the skin taut during placement; loose skin invites smudges and blurring.
- Avoid over-saturation; too much gel causes the design to bleed.
- Work quickly post-shaving because even slight regrowth captures ink unevenly.
- Test a small stencil fragment to confirm transfer quality before tackling full designs.
Common Mistakes During Application
- Skipping proper skin cleaning leads to patchy transfers and premature fading.
- Pressing unevenly produces blotchy sections that demand touch-ups.
- Moving the stencil paper during pressing ruins crisp lines via unwanted smears.
- Using greasy or scented lotions blocks stencil gel, creating ghosted images.
- Rushing peeling prevents the stencil from fully setting causing incomplete patterns.
Avoid these pitfalls and our stencil will look so sharp it could cut through a Rubik’s Cube blindfolded.
Troubleshooting Common Tattoo Design Stencil Problems
Let’s tackle those stencil headaches that sneak up despite our best efforts. Fixing them fast keeps the tattoo session smooth and the design sharp.
Stencil Not Transferring Clearly
Check stencil gel freshness since old gel loses stickiness and clarity. Apply gel evenly in a thin layer; too much creates a paste that blocks detail. Press stencil paper firmly but avoid sliding it to prevent smudging. Dry skin with a clean cloth if it’s too moist since excess sweat or lotion repels the stencil transfer.
Smudging or Blurring of the Stencil
Let the stencil dry completely before moving or touching the applied area; wet ink or gel spreads easily. Keep skin taut during application and after peeling to avoid wrinkles that warp lines. Avoid over-saturating with stencil gel since that makes ink run like it’s on a slip ‘n slide.
Stencil Peeling or Wearing Off Too Quickly
Use fresh stencil gel without diluting it; weak gel causes poor adhesion. Prep hair-free skin by shaving closely to prevent stencil lifting. Minimize skin movement after stencil application and before tattooing starts since friction detaches the design. Reapply a thin gel layer for stubborn peeling spots.
Incomplete or Faded Lines
Check the thermal copier settings—too light or too dark images cause partial transfers. Clean skin well to remove oils blocking stencil absorption. Apply moderate pressure when pressing stencil paper; light presses miss ink, and heavy ones create blotches. Replace stencil paper regularly because reused sheets lose clarity.
Skin Reactions Affecting Stencil Quality
Avoid using high-moisturizer or scented products that react with stencil gel causing irritation and smudges. Inspect skin for redness or bumps before applying the stencil; inflamed areas reject ink. Use hypoallergenic stencil gels to reduce allergic reactions. Pause tattooing if skin starts reacting midway to prevent further damage.
Fixing and Preventing Stencil Issues
Fixing stencil mishaps and preventing new ones saves time and frustration. Mastering these tactics keeps tattoo sessions smooth and designs razor-sharp.
Reapplying the Stencil Correctly
Reapplying the stencil requires a patient hand and flawless skin prep. Ensure the skin is freshly shaved, cleaned with an antiseptic, and completely dry. Apply a thin, even layer of stencil gel to avoid ghosting or smudging. Press the stencil paper firmly but not too hard to prevent ink bleed. Peel the paper back slowly at a sharp angle to crisp every detail. If the stencil flakes or fades, repeat after cleansing and drying the skin again. Avoid rushing the process; haste equals waste —more blotches.
Alternative Stencil Transfer Techniques
Alternative stencil methods rescue designs when traditional gels betray us. Use transfer pencils or pens for small tweaks or touch-ups—they deliver precision where gels falter. Thermal printing with fresh stencil paper creates sharper lines but verify heat settings to dodge fading. For those brave with gadgets, electronic stencil printers offer ultra-clear transfers and reduce manual error. If skin acts rebellious, consider direct freehand drawing as last resort—less stencil, more artist swagger.
Using Different Stencil Transfer Solutions
Different stencil gels and solutions solve various sticky situations. Alcohol-based gels offer quick drying but risk drying out sensitive skin. Water-based gels provide gentle adhesion with minimal irritation—our go-to for delicate patients. Hypoallergenic gels reduce allergic reactions and ensure longer stencil wear time. Test solutions on small skin patches before full application to catch potential flare-ups. Avoid petroleum or silicone-based products—they’re stencil enemies causing premature fading and smudging.
Tips for Maintaining Stencil Integrity During Tattooing
Maintaining stencil integrity during tattooing demands gentle care and strategic moves. Keep the skin taut using non-gloved fingers or sterile tape to minimize stencil distortion. Dab excess ink or blood regularly with a soft cloth instead of aggressive wiping to preserve stencil lines. Reapply stencil gel lightly if lines blur but resist over-saturating; less is more. Stay aware of tattoo needle pressure and angle to avoid scraping stencil away prematurely. When in doubt, touch up fading lines swiftly to keep the design crisp until completion.
Alternative Methods for Tattoo Design Transfer
Exploring alternative transfer methods saves time and frustration when traditional stencils misbehave. Each approach tackles stencil woes with its own quirky flair.
Freehand Drawing and Direct Applications
Freehand drawing wipes out stencil headaches by cutting out the middleman—no paper or gel required. Artists draw directly on skin using skin-safe markers like surgical pens or white pencils. This method shines when designs demand spontaneous tweaks or when stencil complexity triggers a meltdown. Holding the skin taut edges out smudges. Working quickly limits skin irritation or marker fading. Freehand suits smaller tattoos or touch-ups but demands steady hands and artistic confidence from us.
Using Temporary Tattoo Paper
Temporary tattoo paper moonlights as a stencil savior by transforming digital designs into quick-transfer decals. We print the design onto the paper using an inkjet printer then apply the paper face-down onto clean skin. Pressing firmly transfers the design in minutes. This method excels for detailed or multi-color tattoos that traditional stencils struggle with. Waterproof options keep designs crisp under sweaty conditions. However, temporary tattoo paper varies in quality and can sometimes require multiple attempts before perfection. Overall it’s a neat hack for hassle-free, sharp stencil transfers.
Professional Tips for Effective Tattoo Design Stencil Application
Start with perfectly clean and dry skin before applying any stencil. Using an antiseptic scrub or alcohol wipe removes oils and dirt that sabotage stencil adhesion. Avoid lotions or heavy creams that turn gels into slippery mischief-makers.
Apply a thin, even layer of stencil application gel on the skin. Excess gel invites smudges and ghost images like unwanted party crashers. Less is more unless you’re aiming for a blurry modern art effect.
Place the stencil on the skin gently but firmly. Press evenly with a soft cloth or paper towel for about 30 seconds to transfer crisp lines. Press too hard and the design might bleed outside its lines; too soft and you end up with invisible ink.
Remove the stencil paper slowly at a sharp angle, parallel to the skin. Quick peeling triggers a streaky mess resembling a toddler’s finger painting attempts.
Keep the skin taut during and after stencil application. Wrinkles make stencil lines dance like they’re at a disco—funky but unhelpful for precise tattooing.
If the stencil looks faint or patchy, it usually traces back to old gel, oily skin, or rushed pressing. Replace the gel and start fresh instead of wrestling with a ghost that won’t behave.
Use powdered gloves instead of powder-free to avoid additional residue interfering with the stencil. That dude’s powder isn’t invited to the stencil party.
Store stencil gels and papers properly—cool dry places extend their shelf lives. Forget that and you get clumpy gel and faded prints, your stencil’s worst enemies.
Always do a test press on your forearm or a client’s less visible spot to verify stencil clarity before committing to prime real estate on the skin.
Mastering these professional moves means your stencil designs come out sharp precise and ready for the ink—because nobody enjoys a tattoo session that feels like a paint-by-numbers drama.
Conclusion
Tattoo stencil troubles might feel like a never-ending game of “Will it stick or won’t it?” but with a little patience and the right moves, we can turn those smudges into sharp lines. Remember, every great tattoo starts with a stencil that behaves—no ghosting, no peeling, no mysterious disappearing acts.
So let’s keep our gels fresh, our skin clean, and our hands steady. When in doubt, there’s always a backup plan—whether that’s freehand magic or temporary tattoo paper wizardry. After all, the best tattoos come from artists who don’t just follow the stencil, but own it.
Frequently Asked Questions
What are the essential materials needed for creating a tattoo stencil?
High-quality stencil paper, reliable thermal copiers, effective stencil application gels, cleaning supplies, soft cloths, precision razors, and gloves are essential for a successful tattoo stencil application.
Why is skin preparation important before applying a tattoo stencil?
Proper skin preparation ensures the stencil adheres well and transfers clearly. Cleaning, shaving, and using antiseptic solutions prevent smudging and skin irritation, making the tattooing process smoother.
How should I prepare the skin for stencil application?
Clean the area with an antiseptic solution, shave carefully avoiding cuts, and ensure the skin is dry and free from moisturizers or oils that may interfere with stencil gel adhesion.
What is the correct way to apply a tattoo stencil?
Apply a thin layer of stencil gel on a flat, taut skin area, place the stencil paper carefully, press evenly, then peel gently to reveal a clear, sharp stencil design.
What are common mistakes to avoid when applying a tattoo stencil?
Avoid skipping skin cleaning, applying uneven pressure, using excess gel, rushing the peeling process, and applying the stencil on wrinkled or uneven skin to prevent poor stencil transfers.
How can I troubleshoot unclear or smudged stencil transfers?
Check stencil gel freshness, keep skin dry and taut, use hypoallergenic products, inspect thermal copier settings, and apply consistent pressure during the transfer for a clean stencil.
What are the best practices for fixing stencil issues during a tattoo session?
Reapply stencil after thorough skin prep, avoid ghosting by using fresh gel, keep skin taut, dab excess ink, and touch up fading lines promptly to maintain stencil clarity.
What alternative methods can be used instead of traditional tattoo stencils?
Freehand drawing with skin-safe markers and temporary tattoo paper transfers are effective alternatives that offer flexibility and reduce stencil transfer frustration.
What are the pros and cons of temporary tattoo paper transfers?
They allow quick, detailed, and multi-color designs but may vary in quality, sometimes requiring multiple attempts to achieve a perfect transfer.
What professional tips improve tattoo stencil application?
Start with clean, dry skin, use a thin gel layer, press evenly, keep skin taut, avoid excess gel, use powdered gloves, store materials properly, and test the stencil on a less visible area first.