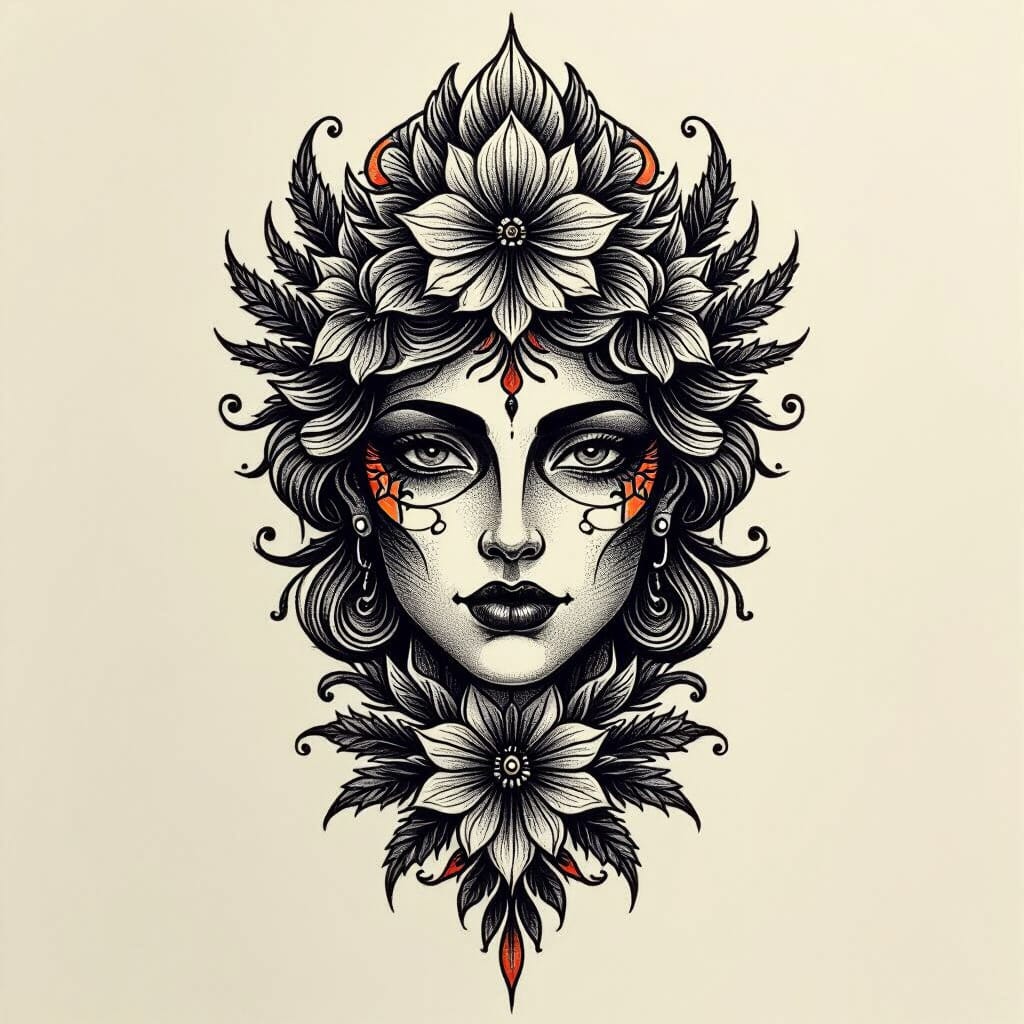
Tattoos are like stories we wear on our skin, except way cooler and less likely to be interrupted by someone asking, “So what happened next?” Illustrative tattoo designs take this storytelling to a whole new level by blending art and imagination into ink that’s as unique as our favorite inside joke.
Whether we’re into bold lines, whimsical sketches, or something that looks like it jumped straight out of a graphic novel, these designs let us show off our personality without saying a word. So, if you’re ready to turn your skin into a masterpiece that sparks conversations (or at least some envious glances), let’s dive into some seriously creative tattoo ideas that might just make you book your next appointment before you finish reading.
Materials and Tools for Illustrative Tattoo Design
Mastering illustrative tattoo design starts with picking the right materials and tools that turn visions into skin-worthy art. Here’s what fuels our creativity and technical precision.
Essential Drawing Tools
Graphite pencils in 2B, 4B, and 6B capture the finest line work to deep shading. Micron pens sized 01 through 05 nail crisp outlines and delicate details. Bristol paper offers a smooth, sturdy surface that laughs at heavy erasing and ink splatters. A trusty eraser, preferably kneaded, twists into shape to rescue every mistake we dare make.
Digital Software Options for Designing
Procreate and Adobe Photoshop dominate digital sketching, offering pressure sensitivity and layer options. Clip Studio Paint charms with brush customization perfect for ink textures. Affinity Designer excels in vector art for clean scalable designs. These programs let us go wild with colors, precise lines, and easy edits before the needle even thinks about buzzing.
Tattooing Equipment Overview
A coil tattoo machine pumps classic power with rhythmic reliability. Rotary machines slide smoothly for detailed illustrative work or shading marathon sessions. Sterile needles come in assorted groupings—liners for outlines and shaders for filling—in sizes 3 to 9 rounds or mags depending on the effect. Ink bottles in black, gray wash, and vivid hues bring our designs alive under the skin’s canvas. And don’t forget disposable gloves and autoclaved grips to keep everything sanitary and our clients smiling.
Finding Inspiration for Illustrative Tattoo Design Ideas
Tapping into sources of inspiration sparks creativity for illustrative tattoo designs. We dive into distinct themes that provide endless fuel for unique artwork.
Exploring Nature and Wildlife Themes
Observing nature offers a wild gallery of designs featuring animals, plants, and landscapes. We sketch delicate ferns, roaring lions, and soaring eagles, each carrying symbolic weight or personal meaning. For instance, three types of flowers — roses, lilies, and daisies — provide floral motifs that range from romantic to rustic. Capturing textures like fur, feathers, and bark adds a tactile sense to the illustration that jumps off the skin. Nature’s endless variety ensures palettes rich in greens, browns, and vibrant hues that enliven any tattoo.
Incorporating Mythology and Folklore
Mythical creatures and folklore legends open portals to otherworldly ink fantasies. We embrace dragons breathing fire, mermaids lounging on rocks, and phoenixes rising from ashes. Characters from Greek, Norse, or Egyptian mythologies inject historical grandeur while adding narrative depth. Symbols like Thor’s hammer or Medusa’s snake hair mix visual storytelling with bold symbolism. These themes allow intricate designs with intertwining elements for an eye-catching, layered effect.
Using Art History and Famous Illustrations as Reference
Referencing art history and iconic illustrations refines illustrative tattoos, blending classic with contemporary. We draw inspiration from artists like Alphonse Mucha’s ornate Art Nouveau lines or Hokusai’s dramatic waves. Vintage botanical prints and 19th-century etchings offer fine line details perfect for skin artistry. Incorporating elements from graphic novels or comic book styles injects a pop culture edge. Using these styles challenges us to translate well-known aesthetics into skin-safe storytelling.
Steps to Create an Illustrative Tattoo Design
Creating an illustrative tattoo design unfolds like crafting a visual punchline that lasts forever. Follow these steps to turn ideas into skin-worthy art.
Sketching the Initial Concept
Start by roughing out the core idea on Bristol paper with graphite pencils or digital tools like Procreate. Capture bold outlines and basic shapes quickly before jumping into details. Sketch multiple versions to explore different angles and compositions. Keep it loose so creativity stays on the front burner rather than precision.
Refining the Design With Details and Shading
Focus on adding fine lines and textures using Micron pens or digital brushes next. Enhance depth with cross-hatching or stippling techniques—because flat tattoos are about as exciting as a drawing of a potato. Shade to emphasize contours and create a sense of volume that pops off the skin.
Choosing the Right Color Palette
Select colors that boost the design’s mood—saturated reds for drama, muted earth tones for vintage vibes. Limit the palette to three to five hues to avoid turning your masterpiece into a rainbow road. Consider skin tones to ensure colors remain vibrant and harmonious once inked.
Digitizing or Preparing the Design for Tattooing
Scan or export the refined design at high resolution if working digitally. Convert lines into vector paths for crisp scaling, or print clean outlines for stencil transfer. Collaborate with the tattoo artist to tweak placement and size, guaranteeing the final tattoo looks as sharp as our digital files.
Techniques for Enhancing Illustrative Tattoo Designs
Sharpening illustrative tattoos takes more than just good ideas. Mastering line work texture balance elevates these designs from “meh” to “wow” on skin canvases everywhere.
Using Line Work Effectively
Harness varied line weights to add life to our tattoos. Thicker lines define main shapes, while thinner lines deliver intricate details like fur or tiny feathers. Mixing straight and curved lines creates dynamic flows that guide eyes naturally. For example, a fox tattoo shines when bold outer lines frame delicate whiskers. Consistent line work prevents the tattoo from looking like a toddler’s doodle sprinted out of the sketchbook.
Adding Texture and Depth
Layer textures using stippling or cross-hatching to simulate visual weight without turning our designs into black holes. These techniques mimic shadows or rough surfaces like tree bark or scales with tiny dots and crisscrossed lines. Gradual shading enhances the illusion of three-dimensionality. For instance, a floral design pops when petals sport subtle cross-hatching shadows near their base. Always remember, textures add richness and story, not just noise.
Balancing Bold and Fine Details
Blend bold and fine details as perfectly as peanut butter and jelly. Bold elements serve as anchors anchoring viewers’ focus; fine details act like seasoning adding subtle polish. Overdoing boldness can turn tattoos into blobs; too many fine details risks blurriness in the long run. Aim for contrast and spacing, so bold shapes frame intricate bits like veins on leaves or tiny facial features in portraits. That way, our tattoos remain crisp and striking even years down the road.
Tips for Choosing the Perfect Illustrative Tattoo Design
Picking an illustrative tattoo design twists creativity and practicality into a wild dance. We land the best results by balancing art with our body’s natural canvas.
Matching Design to Body Placement
We start with body placement. Choosing an area that suits the design’s flow makes all the difference. For example, sweeping animal illustrations bounce off limbs and shoulders, while intricate mythological scenes thrive on flat spaces like the back or chest. We match curved lines to rounded areas to avoid distortion. If we want a whimsical sketch, we avoid spots that stretch awkwardly like the elbow or knee. Designs pop when placement feels like they were born there.
Considering Size and Scale
We consider size and scale seriously. Large designs such as full-back pieces unfold details and textures freely. Tiny tattoos demand simplicity and bold lines to stay sharp over time. If we crave complexity but our tattoo area is small, we simplify shapes or go for a single standout element. We remember that smaller veins and muscles play tricks on fine details. Scaling intelligently prevents turning a masterpiece into a blob.
Personalizing Your Design
We personalize designs by weaving in personal stories or symbols. Incorporating favorite animals, plants, or meaningful motifs creates layers of meaning. If we love mythology, we might tweak a dragon’s eyes to match our spirit animal’s gaze. Adding a hidden date or initial keeps secrets locked in ink. Personalization transforms art from something we wear into something that wears us back—with attitude.
Working With a Tattoo Artist
Collaborating with a tattoo artist brings our illustrative tattoo ideas to life. Clear communication and mutual understanding ensure the artwork on our skin matches our vision perfectly.
Communicating Your Illustrative Tattoo Ideas Clearly
Expressing our illustrative tattoo ideas involves describing key elements like subject, style, and vibe. Sharing reference images such as sketches, digital art, or photos sharpens the artist’s vision. Explaining preferences for line weight, color schemes, and textures helps the artist understand our style. Asking direct questions keeps both parties synced and allows space for creative input without confusion.
Reviewing the Design and Making Adjustments
Reviewing the tattoo design requires a sharp eye for details like proportions, shading, and line clarity. Pointing out any required tweaks such as resizing elements or enhancing contrast prevents surprises later. Requesting a mock-up on a photo of the intended body part provides context for scale and flow. Agreeing on final adjustments before the needle starts ensures the tattoo looks fantastic from day one.
Preparing for the Tattoo Session
Preparing for the tattoo session means hydrating well and resting enough to reduce discomfort. Shaving the tattoo area, if appropriate, creates a smooth canvas for the artist to work on. Wearing comfortable clothing with easy access to the tattoo spot speeds up setup. Arriving early allows time for final discussions and calming pre-needle jitters. Bringing snacks and entertainment keeps the mood light during long sessions.
Troubleshooting Common Issues With Illustrative Tattoos
Illustrative tattoos can lose their charm if fading, blurring, or design flaws sneak in. Let’s tackle these pesky problems like pros.
How to Avoid Fading and Blurring Over Time
Keeping illustrative tattoos crisp means shielding them from UV rays and constant friction. Sunscreen with SPF 30 or higher defends ink from fading when outdoors. Wearing loose clothing prevents rubbing that blurs fine lines and delicate shading. Hydrating skin daily maintains elasticity and ink vibrancy. Touch-ups every 3 to 5 years restore sharpness—ignoring this leads to smudged art that screams “I got this a decade ago.”
Fixing Design Problems After the Tattoo Is Done
When designs turn out less-than-perfect, corrective tattooing or laser removal comes to the rescue. Cover-ups work well if original art feels too bold or misplaced, as layering darker ink hides flaws. Laser removal suits fading errors but requires multiple sessions spaced 6 to 8 weeks, during which patience builds character. Minor irregularities call for touch-ups that sharpen lines or adjust shading without committing to a full redo. Consulting the artist early avoids expensive fixes and comic-result disasters.
Conclusion
Illustrative tattoos aren’t just ink on skin—they’re mini masterpieces that tell our stories with a splash of creativity and a dash of personality. Whether you’re sketching with pencils or swiping through digital palettes, the magic lies in making the design truly yours.
So, grab your inspiration, chat with your artist like a pro, and get ready to wear your imagination on your sleeve—literally. Just remember to keep that sunscreen handy and maybe skip the tight jeans for a while. Your future self (and your tattoo) will thank you!
Frequently Asked Questions
What makes illustrative tattoos unique compared to other styles?
Illustrative tattoos combine artistic drawing styles with imaginative storytelling, allowing for detailed, creative designs that reflect a person’s personality. They often use fine lines, shading, and textures inspired by sketches or art history, making each piece visually dynamic and deeply personal.
What tools are essential for creating illustrative tattoo designs?
Key tools include graphite pencils and Micron pens for fine line work, Bristol paper for sketching, and digital software like Procreate or Adobe Photoshop for refining and adding color. Tattoo machines, needles, and high-quality inks are vital for the actual tattooing process, alongside strict sanitation practices.
Where can I find inspiration for my illustrative tattoo design?
Popular sources include nature and wildlife, mythology and folklore, and famous art history illustrations. These themes provide symbolic meaning and rich visual elements that can be personalized to create unique stories on skin.
How do I start designing an illustrative tattoo?
Begin with rough sketches on paper or digitally, experiment with line work and shading, and choose a color palette that fits the design’s mood. Refine the artwork through multiple versions and collaborate with your tattoo artist to ensure the final design suits your body placement and style.
What techniques enhance the quality of illustrative tattoos?
Mastering line weight variation, like combining thick and thin lines, plus using texture techniques such as stippling and cross-hatching, adds depth and dimension. Balancing bold and fine details ensures the tattoo remains clear and impactful over time.
How do I choose the perfect location and size for an illustrative tattoo?
Consider body areas where the design will flow naturally and be easily visible if desired. Size matters too—complex designs need enough space to retain detail, but can be scaled appropriately for smaller areas with careful adjustment.
Why is collaborating with a tattoo artist important?
Working closely with your artist helps translate your vision into a practical, beautiful tattoo. Clear communication about style, subject, and reference images ensures the design meets your expectations, and reviewing the artwork allows for necessary changes before getting inked.
How can I prepare for a tattoo appointment to ensure the best experience?
Hydrate well before your session, wear comfortable clothing that provides easy access to the tattoo area, and arrive early to relax. Proper preparation supports better healing and a smoother tattoo process.
How do I maintain the look of my illustrative tattoo over time?
Protect your tattoo from sun exposure using sunscreen, keep the skin moisturized, and wear loose clothing to avoid irritation. Schedule touch-ups every few years to keep lines sharp and colors vibrant.
What should I do if my illustrative tattoo starts to fade or blur?
Consult your tattoo artist early about options like touch-ups or corrective tattooing. In cases of major issues, cover-ups or laser removal might be necessary. Early action helps prevent costly or complicated fixes later.